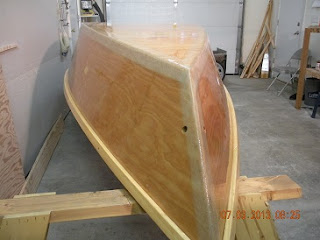
Inwhales and Rubrails
After the interior joints are complete, the inwhales can be installed.
I originally desired to build this boat with no metal fasteners. But, working by myself, I found that when it came to clamping 14-foot long inwhales with thickened epoxy applied, there was no way I could get the inwhales in their precise location and it would be an epoxy mess. So, I adopted this process:
1) Cut and prep the inwhale to final dimensions, except the top surface. The top surface will be sanded later.
2) Clamp the dry inwhale in-place, exactly where I want it.
3) Install stainless steel screws as needed to mount the inwhale. I installed the screws from the outside, through the side panel and riblets, into the inwhale. I countersunk the screws in the side panel since the rubrail will be glued to the outside of the side panel over the screws. (See the TIP below)
4) Remove the clamps.
5) Remove the screws.
6) Coat the gluing surfaces with un-thickened epoxy.
7) Butter the side panel and riblets with thickened epoxy for gluing the inwhale.
8) Use the screws to install the inwhale so it is both screwed and glued.
9) Use clamps as needed to get a little thickened epoxy to squeeze out between the side panel and the inwhale where there are no screws.
10) Remove excess thickened gluing epoxy before it cures.
The exterior stem and transom joints can be rounded and taped.
The rubrails can be installed.
To screw and glue 16-foot rubrails, I:
1) Prep the outer and bottom faces to final conditions but I left the rubrails long, to be cut and sanded to their final length after the gluing epoxy cures.
2) Clamp the dry rubrail in-place, exactly where I want it.
3) Install stainless steel screws as needed to mount the rubrail. I installed the screws from the outside, through the rubrail and side panel, into the riblets or inwhale. I countersunk the screws in the rubrail for plugging.
TIP: IT IS AT THIS POINT WHERE I REALIZED THAT THE INWHALE SCREWS ARE IN THE WAY OF THE RUBRAIL SCREWS. NOTE TO SELF: NEXT TIME, INSTALL THE INWHALE SCREWS LOWER AND THE RUBRAIL SCREWS HIGHER SO THEY DO NOT INTERFERE WITH EACH OTHER.
4) Remove the clamps.
5) Remove the screws.
6) Coat the gluing surfaces with unthickened epoxy.
7) Prepare some thickened epoxy for gluing. Don't prepare the whole batch, just enough for a few feet of rubrail.
8) Butter 3 feet of the side panel gluing surface with thickened epoxy for gluing the rubrail. Don't butter over the screw holes, you will need to know where they are located.
9) Use the screws to mount about 2 feet of rubrail.
10) Use clamps as needed to get a little thickened epoxy to squeeze out between the side panel and the 2 feet of screwed rubrail.
11) Scrape off the squeezed-out thickened epoxy and use the scraped-off thickened epoxy to butter another 2-feet of the side panel.
12) Repeat steps 9 through 11 as needed to mount the entire rubrail, adding a little bit of new thickened epoxy when needed.
13) Use the extra thickened epoxy to plug the screw holes and cover the screw heads. Let the plug epoxy stick out a little beyond the rubrail surface.
14) After the epoxy has cured, remove the clamps and cut the rubrail ends a hair long of their final length. Sand them to their final length.
15) Sand the epoxy screw head plugs flush with the rubrail.
Bottom Work
Turn the boat over and pull the stitches. Use diagonal snips to snip the stitches where the stitches' path through the epoxy will be straightest. Use vise grips to grab the stitches and pry against a piece of scrap wood.
Note the Lady C in the background. Built her over 20 years ago. Another Tracy O'Brien stitch and glue design.
Sand the chines round for taping.
Fiberglass the bottom
 |
| Dry lay up of the bottom fiberglass fabric |
Install biaxial fiberglass tape to the chines.
In the above picture, note the hole through the stem. The hole does not allow water in because of the glob of epoxy, sawdust and fiberglass inside the stem. This glob is where excess epoxy goes during other parts of the work.
I installed a steel bow eye on the Lady C. On her maiden voyage, as I pulled away from the float on a windy day, the bow swung over the float and I heard a strange snap. When we spun around far enough, I could see that my bow eye had hooked on a float cleat and broke clear off. The bow eye was hanging on the cleat. I couldn't do that again in a million tries.
On the next trip I saw the Blue Heron moored in Little Jakolof Bay with a hole through her stem rather than a bow eye. Six of my boats now have holes through their stems and no bow eyes.
Install the skeg
The wet-out of the bottom fiberglass fabric, biaxial taping of the chines and gluing of the skeg were all done in one grueling 5 hour session so that no epoxy curing occured between layers. The bottom fiberglass cloth and chine tape are epoxied directly to the dry plywood and the fabric and tape have a chemical bond wherever they overlap. The skeg has a chemical bond to the bottom fabric.
Finish the bottom by removing the excess fiberglass. The sharp egdes of fiberglass are smoothed and the chines get a final coat of epoxy and the bottom is complete.


No comments:
Post a Comment
Note: Only a member of this blog may post a comment.